 CONTRIBUTING WRITER – FRANK MORTON
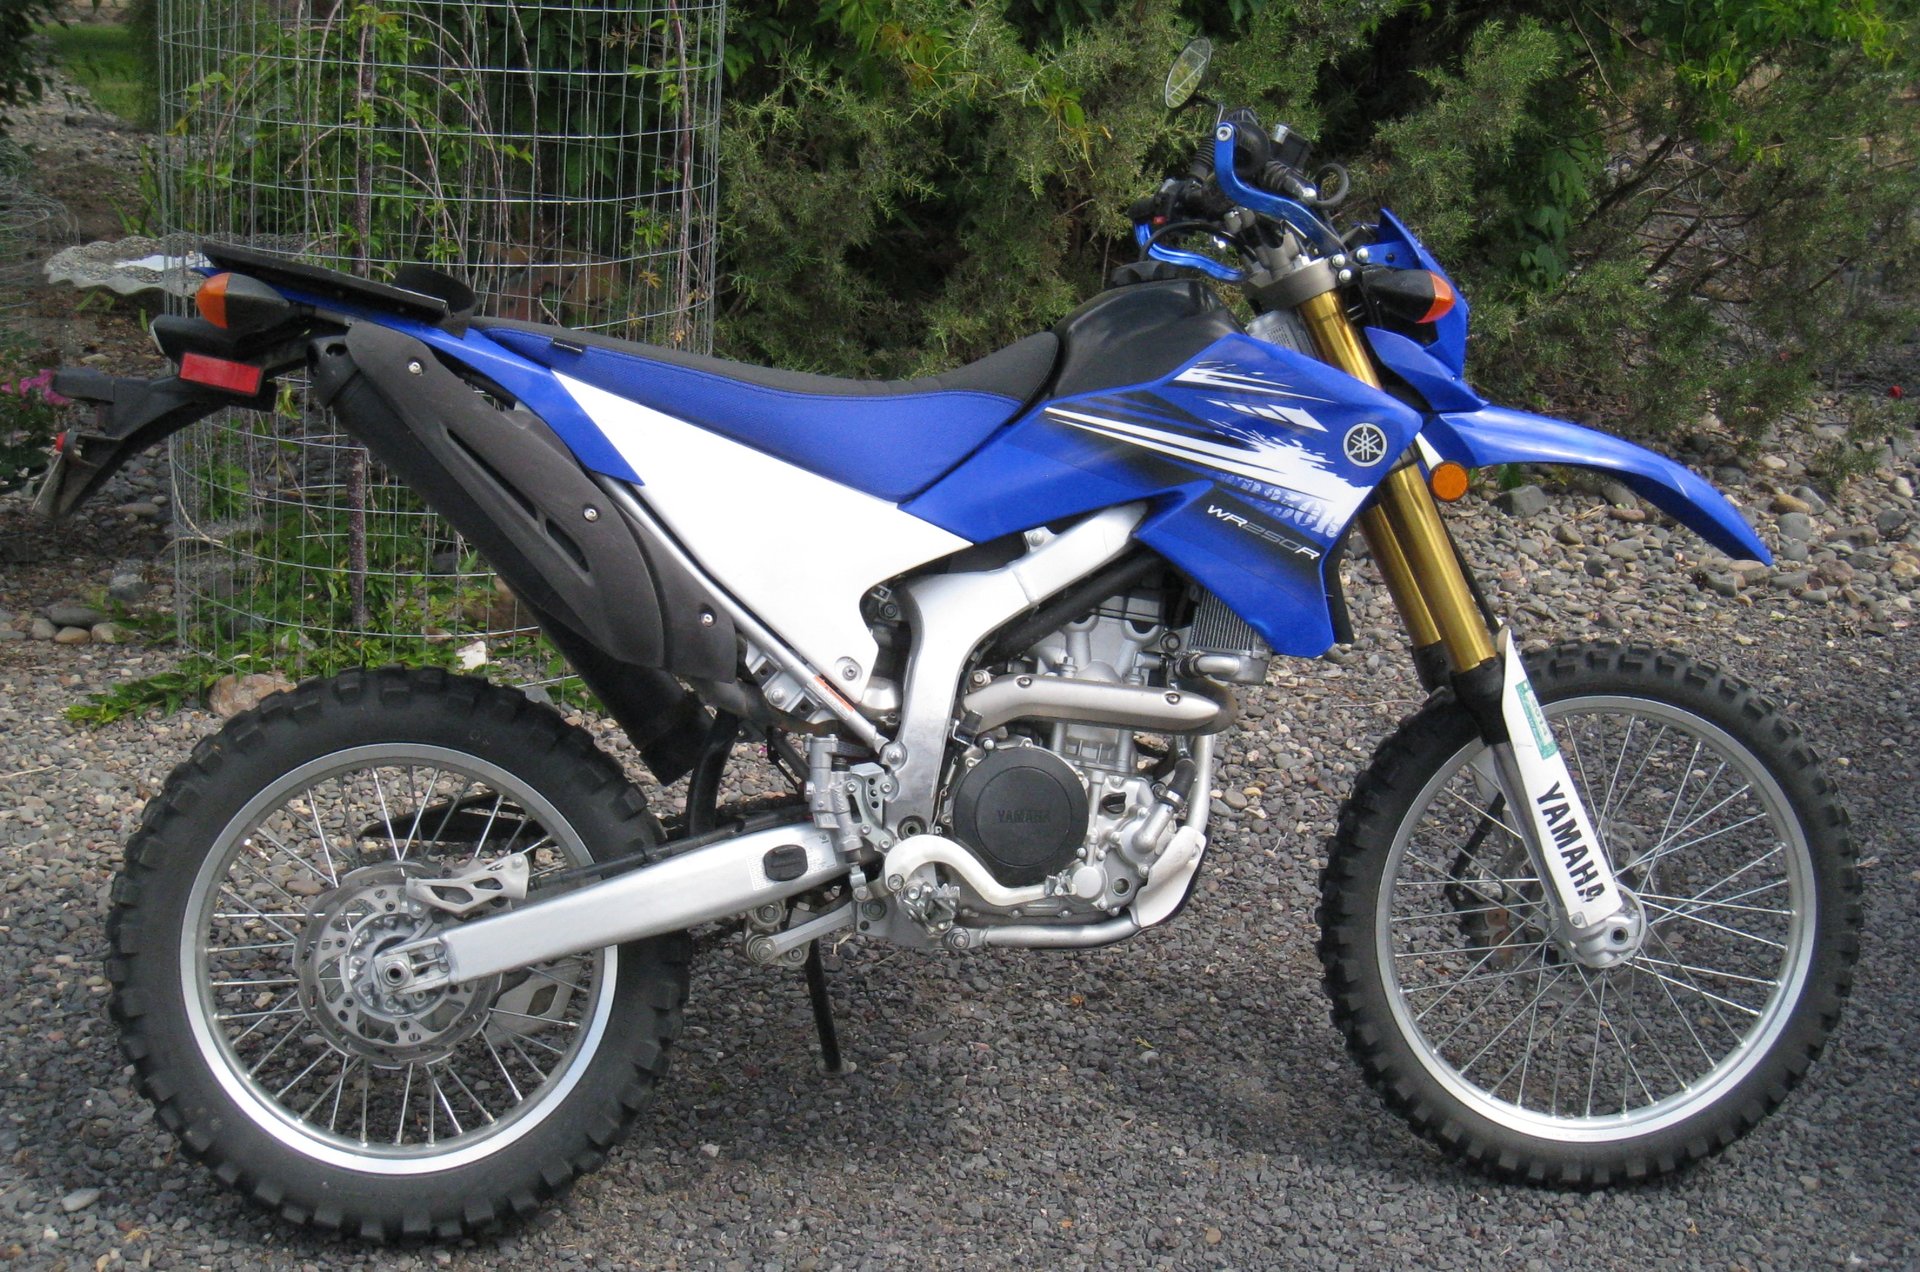
I’ve got over 8,000 dirty miles on my 2012 Yamaha WR250R and I’ve spent a lot of them thinking about upgrading the performance of this small bore bike. I’ve even wondered if I should have let loose an extra four grand for the ‘race ready’ KTM 350. In talking it over with my wife, she made one astute and profound observation: Your body isn’t race ready, why should your bike be? Hard to argue with that one.
Up to now most of my rides have been between 40 to 160 miles a day and varied mainly between gravel roads, old logging roads, and some single track. For that the stock set up seemed OK. But lately I’ve been venturing out a bit further and pushing myself harder – my last 230 mile dirt ride nearly crippled me! That got me thinking, if this bike isn’t comfortable enough to ride long distances, who really cares how good the performance is?
With that in mind, my first upgrade was the seat and I chose Seat Concepts’ standard option. Shipping was fast and installation was surprisingly quick and easy: simply remove the seat, remove the stock cover from the seat pan, and remove the stock foam; then glue the new foam to the pan and staple the new cover onto the pan. I’m fortunate enough to have an air stapler, so the whole process went very smoothly. It looks great and is a pleasure to ride. I really like how the seat flares out, making it wider in the middle. Between this and the gripper cover, I find that it gives me more stability when I stand up. I can lock my legs onto it and it holds nicely. This was $175 well spent.
CONTRIBUTING WRITER – FRANK MORTON
I’ve got over 8,000 dirty miles on my 2012 Yamaha WR250R and I’ve spent a lot of them thinking about upgrading the performance of this small bore bike. I’ve even wondered if I should have let loose an extra four grand for the ‘race ready’ KTM 350. In talking it over with my wife, she made one astute and profound observation: Your body isn’t race ready, why should your bike be? Hard to argue with that one.
Up to now most of my rides have been between 40 to 160 miles a day and varied mainly between gravel roads, old logging roads, and some single track. For that the stock set up seemed OK. But lately I’ve been venturing out a bit further and pushing myself harder – my last 230 mile dirt ride nearly crippled me! That got me thinking, if this bike isn’t comfortable enough to ride long distances, who really cares how good the performance is?
With that in mind, my first upgrade was the seat and I chose Seat Concepts’ standard option. Shipping was fast and installation was surprisingly quick and easy: simply remove the seat, remove the stock cover from the seat pan, and remove the stock foam; then glue the new foam to the pan and staple the new cover onto the pan. I’m fortunate enough to have an air stapler, so the whole process went very smoothly. It looks great and is a pleasure to ride. I really like how the seat flares out, making it wider in the middle. Between this and the gripper cover, I find that it gives me more stability when I stand up. I can lock my legs onto it and it holds nicely. This was $175 well spent.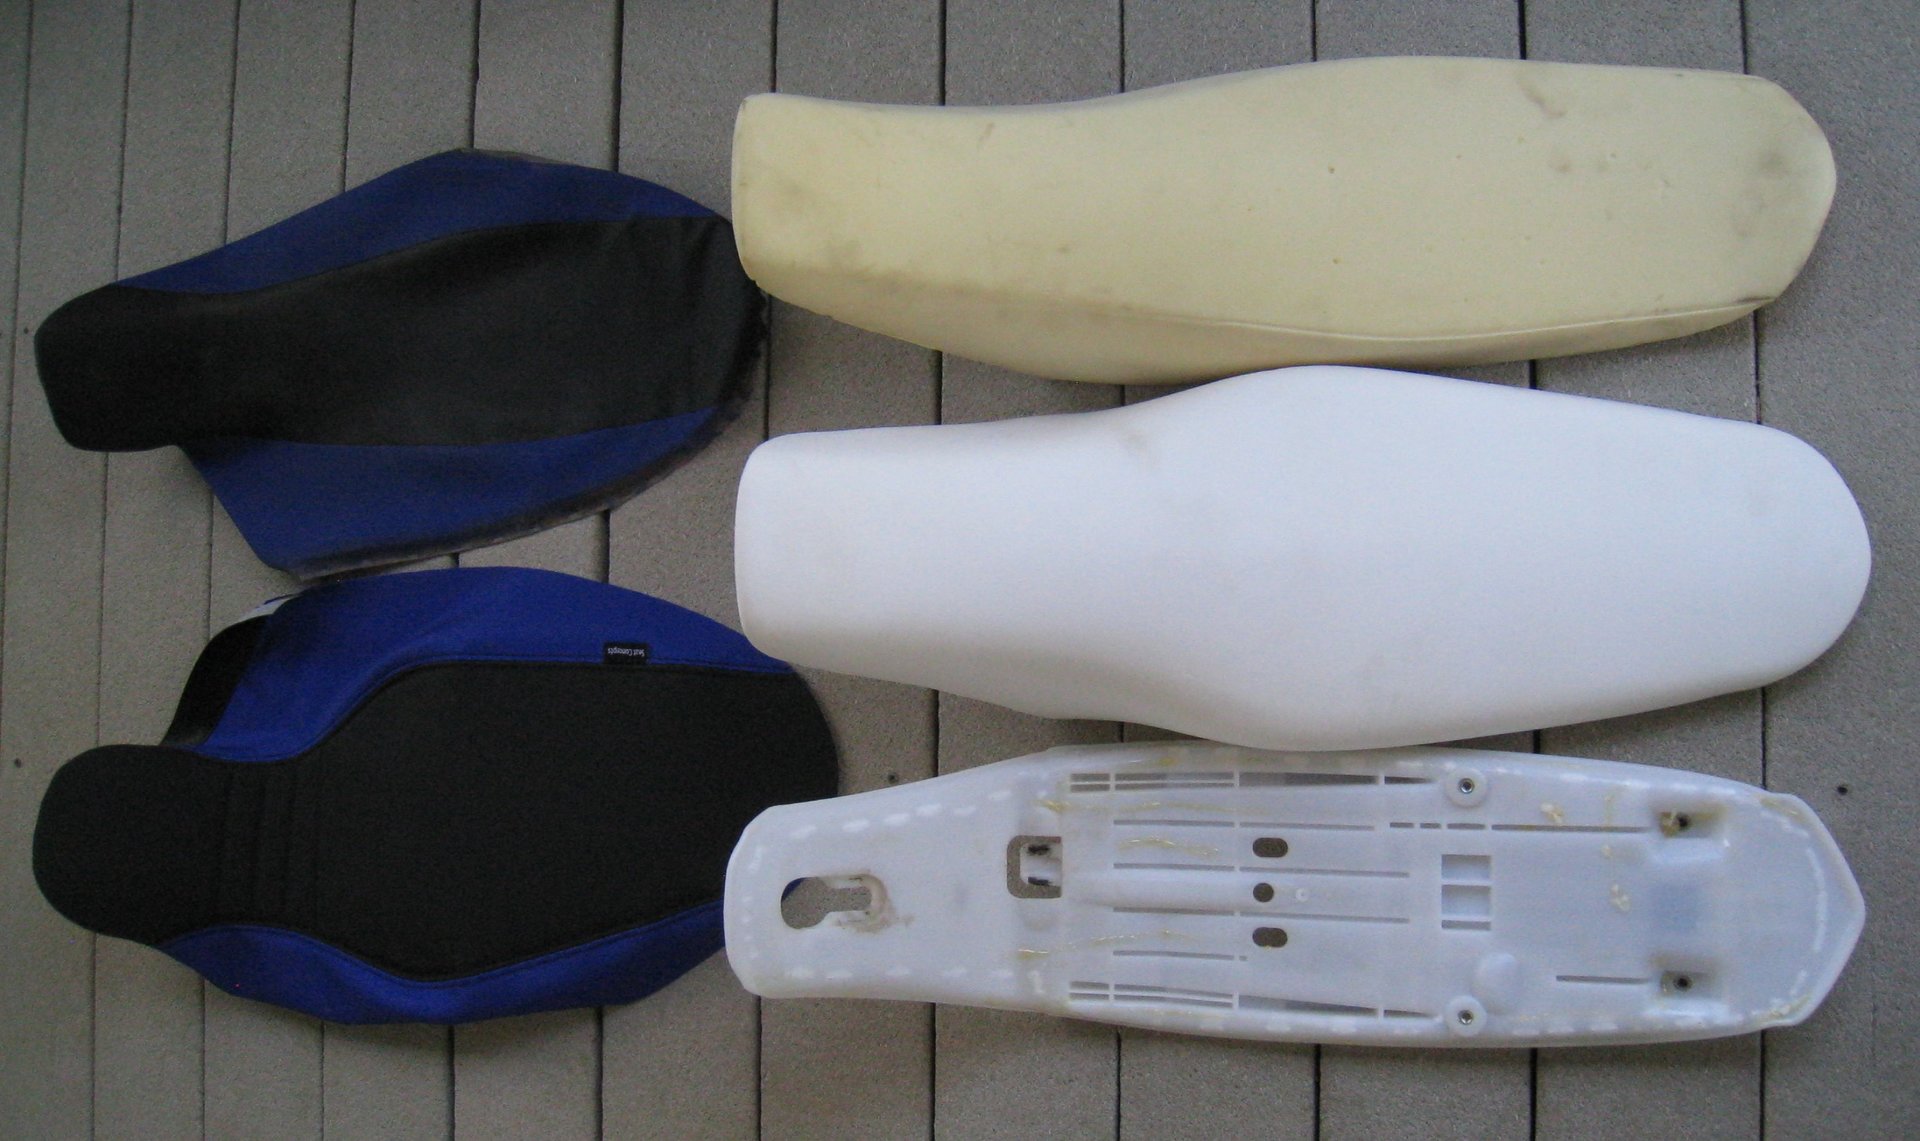 The next project was upgrading the WR250R’s suspension. Searching the web, I seemed to keep coming back to Race Tech’s website that has a spring calculator, which you enter personal data into such as height, weight, age, experience, and riding style. Then it tells you what your factory spring rate is and what it should be. Seemed simple enough so I got busy and plugged in all my data.
I hit the enter key and two things happened – first, I was redirected to a Ford F350 Super Duty racing suspension site (WTF?), and second, I got an email from Race Tech suggesting that I consider switching to a side-by-side or heavy-duty quad.
So off I go to a local moto service shop specializing in suspension upgrades and ask them what they can do for me. I was told that they’ll enter all my data into Race Tech’s calculator, order me a spring, charge me $90 to install it, set my compression and rebound to neutral and push me out the door hoping I can set it correctly. Oh, and additional parts and labor will be extra. Well this just ain’t gonna happen!
Then it was back to the computer where I logged into Race Tech’s website under a different name and user profile. I more or less fudged the data until I found the spring that should work for me, which I believe is called the ‘lard ass option’. OK, I lied, but they do have one for old guys my size, so I bought it.
The next project was upgrading the WR250R’s suspension. Searching the web, I seemed to keep coming back to Race Tech’s website that has a spring calculator, which you enter personal data into such as height, weight, age, experience, and riding style. Then it tells you what your factory spring rate is and what it should be. Seemed simple enough so I got busy and plugged in all my data.
I hit the enter key and two things happened – first, I was redirected to a Ford F350 Super Duty racing suspension site (WTF?), and second, I got an email from Race Tech suggesting that I consider switching to a side-by-side or heavy-duty quad.
So off I go to a local moto service shop specializing in suspension upgrades and ask them what they can do for me. I was told that they’ll enter all my data into Race Tech’s calculator, order me a spring, charge me $90 to install it, set my compression and rebound to neutral and push me out the door hoping I can set it correctly. Oh, and additional parts and labor will be extra. Well this just ain’t gonna happen!
Then it was back to the computer where I logged into Race Tech’s website under a different name and user profile. I more or less fudged the data until I found the spring that should work for me, which I believe is called the ‘lard ass option’. OK, I lied, but they do have one for old guys my size, so I bought it.
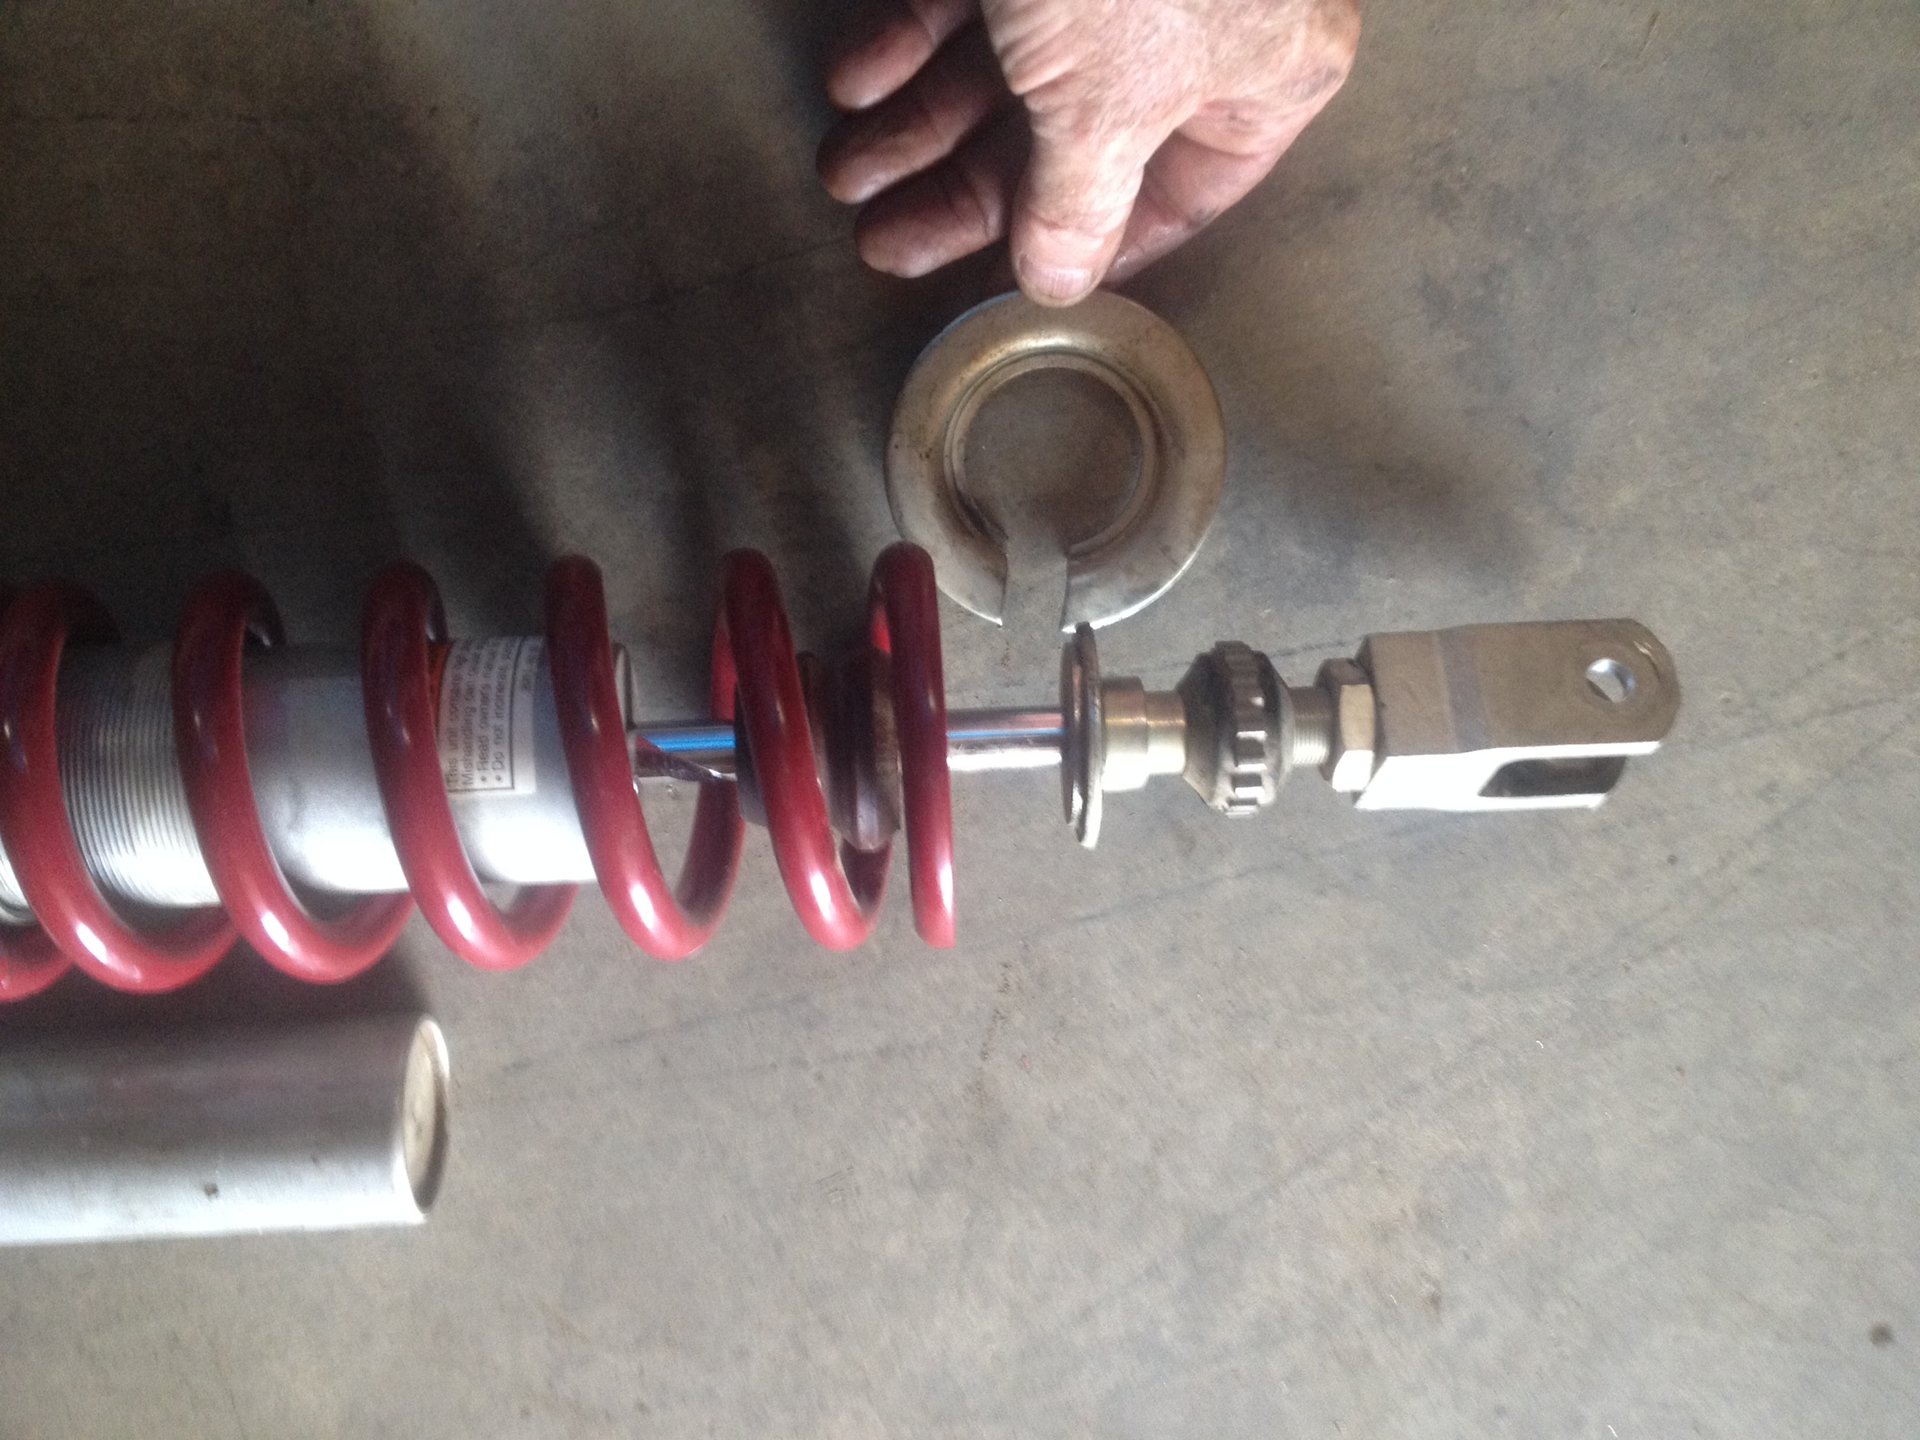
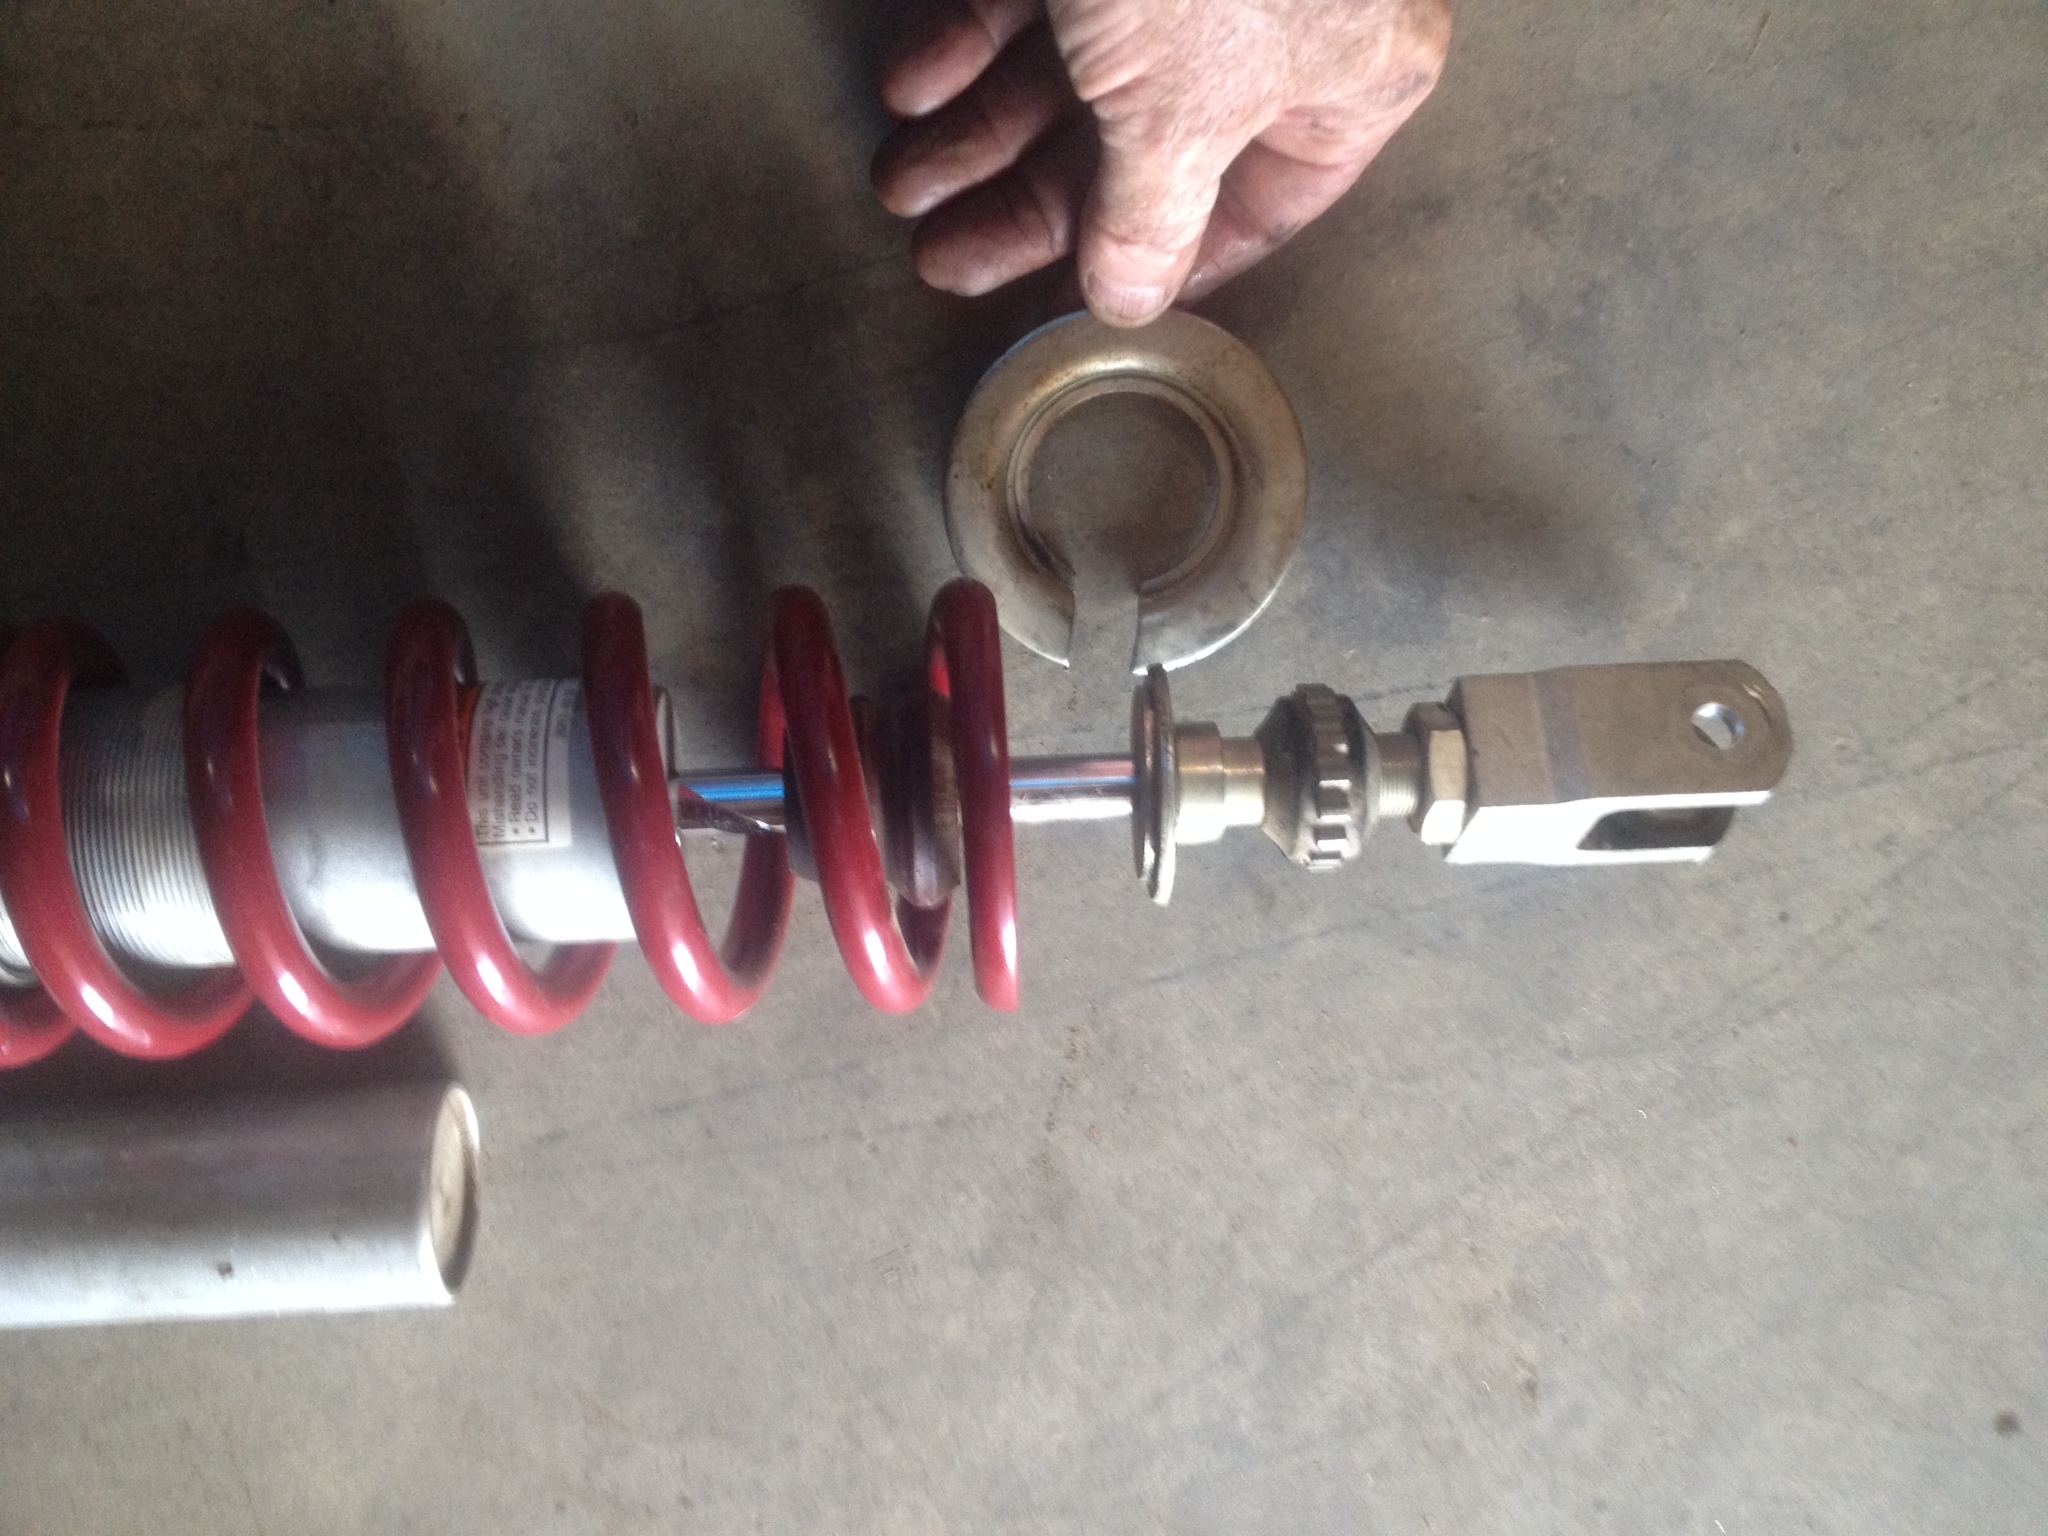
 While I was waiting for it to arrive, I wasted countless hours of quality nap time designing a spring compressor so that the install will be will be quick, smooth, and hopefully painless. Ultimately I designed a spring compressor that should have enough leverage to crush the landing gear of a small Lear jet. Bring on the spring!
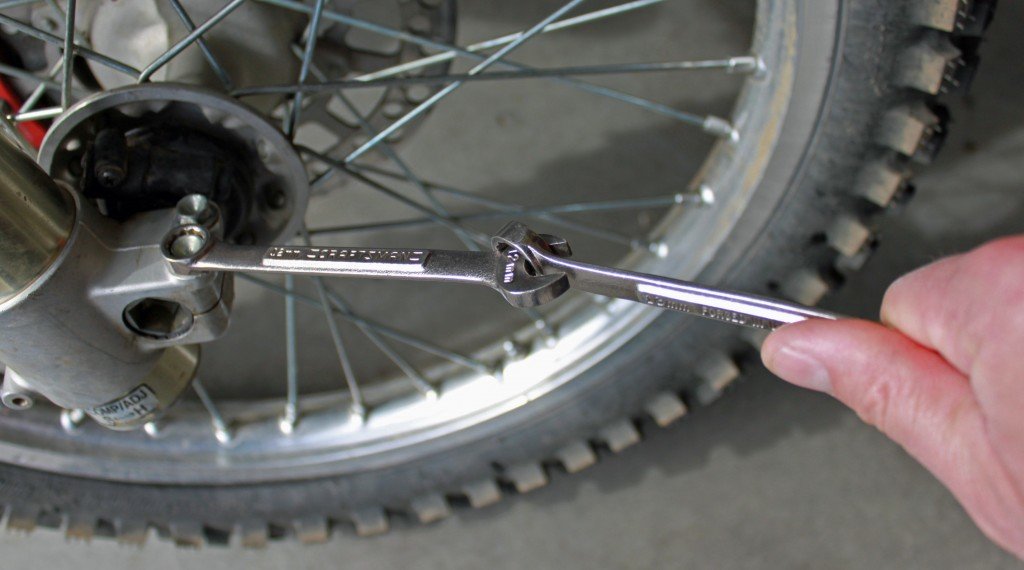
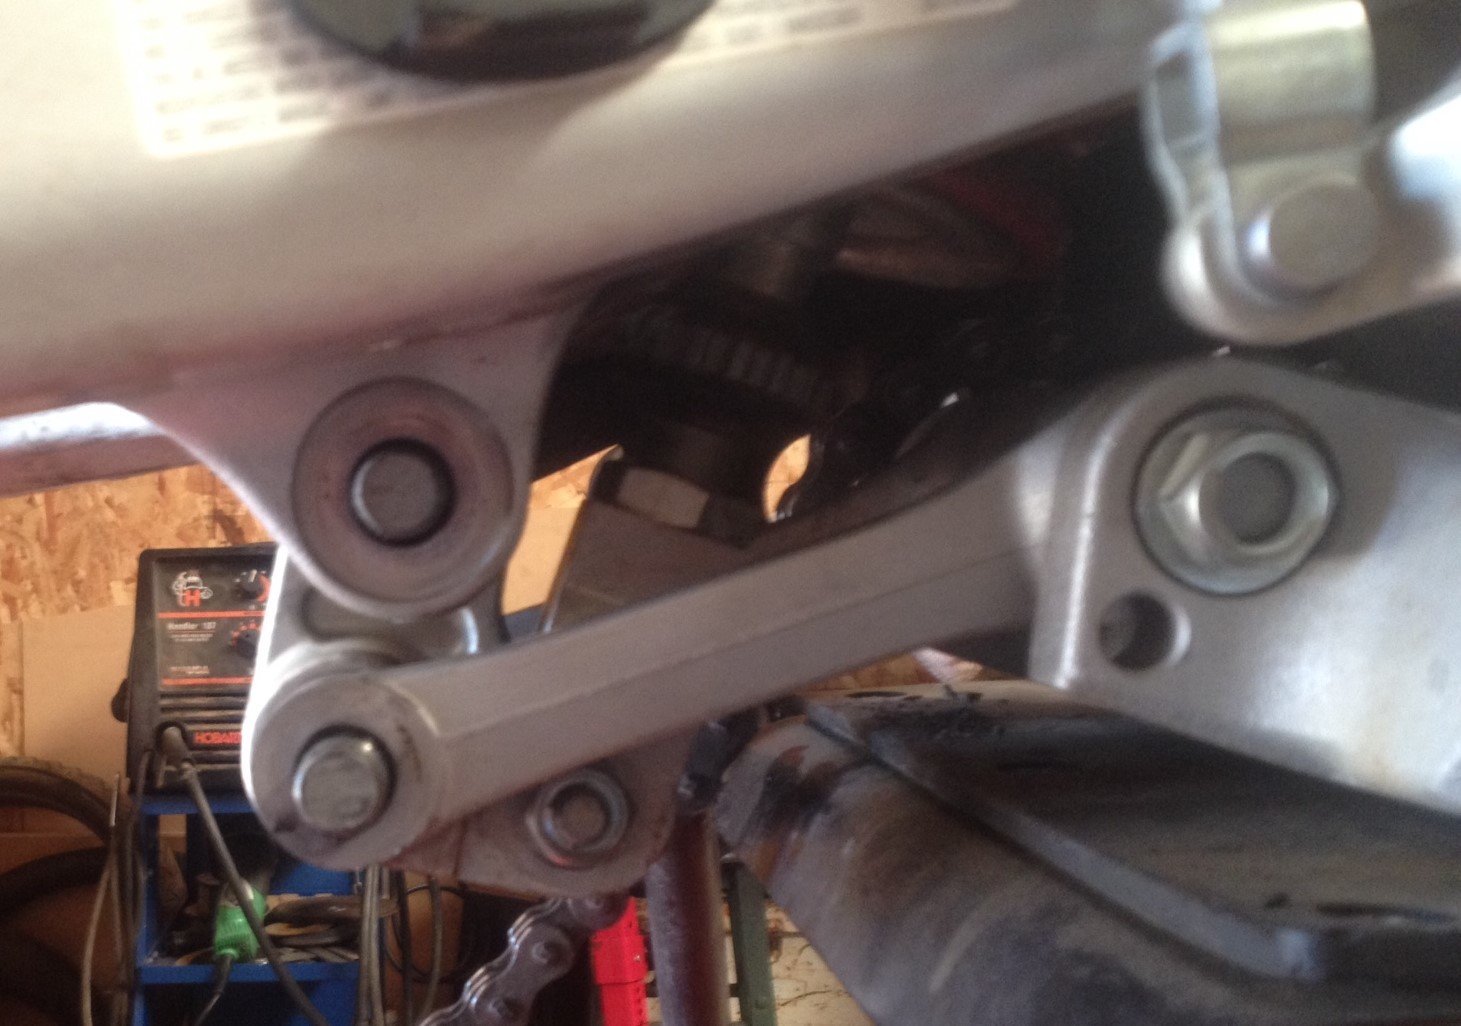
When the spring arrived I put the bike on the lift and jacked the bike up to raise the rear wheel off the ground. I pulled out the cutting torch and sledge hammer and fired up the welder (just in case). Then I removed the rear wheel and the swing arm assuming that the shock drops out the bottom. It doesn’t.
While I was waiting for it to arrive, I wasted countless hours of quality nap time designing a spring compressor so that the install will be will be quick, smooth, and hopefully painless. Ultimately I designed a spring compressor that should have enough leverage to crush the landing gear of a small Lear jet. Bring on the spring!
When the spring arrived I put the bike on the lift and jacked the bike up to raise the rear wheel off the ground. I pulled out the cutting torch and sledge hammer and fired up the welder (just in case). Then I removed the rear wheel and the swing arm assuming that the shock drops out the bottom. It doesn’t.
 You simply remove what’s called the rear arm relay, unbolt the top of the shock, and slide it out the left side between the frame and the battery. Crap. Then again, if you’ve already removed the rear wheel and swing arm, grease the swing arm bearings and just tell everyone that was your initial intention anyway…
And now to my spring compressor. Well, as it turns out, you don’t need one. Just unscrew the large nuts holding the top of the spring (where you set your sag), slide the spring up, remove the spring cradle on the bottom, and slide the spring off the shock. Literally takes only about 10 minutes.
You simply remove what’s called the rear arm relay, unbolt the top of the shock, and slide it out the left side between the frame and the battery. Crap. Then again, if you’ve already removed the rear wheel and swing arm, grease the swing arm bearings and just tell everyone that was your initial intention anyway…
And now to my spring compressor. Well, as it turns out, you don’t need one. Just unscrew the large nuts holding the top of the spring (where you set your sag), slide the spring up, remove the spring cradle on the bottom, and slide the spring off the shock. Literally takes only about 10 minutes.
 Reverse the entire process, and you’ve just upgraded the rear suspension. (Editor’s Note: Don’t forget to set your sag!) This upgrade was very straight forward and easy. If you’re thinking about trying it, I would encourage you to do so.
Keep in mind though that my shock was in good shape, so there was no need for having that rebuilt. And this suspension upgrade is the bare minimum, it won’t improve valving. You may wonder why I addressed only the rear spring and not the front ones. Oddly enough, Race Tech’s calculator shows that my fork springs are within 10 pounds of rider weight to being correct. Seemed odd that Yamaha would spring the front for me and the rear for my grandson, but that’s what they did.
How’s it ride, you ask? I headed out 13 miles on pavement to a local OHV park, and was pleased right from the start. I expected the ride to be a bit more harsh, but it isn’t. It’s firmer, but I honestly believe it also feels more forgiving. I hit the OHV park via a heavily gravelled powerline road and was immediately impressed. The bike felt more planted and stable. Like the rear wheel was tracking the front better than stock. I hit a couple of mild hill climbs consisting of loose sand and rock with the same feeling, like the back was tracking better, not throwing me side to side like a missile whose guidance system just failed. The last thing I noticed was that the WR250R was much easier to control in the whoops. I never did get ‘nutted’, which was just fricking awesome!!
Some things to keep in mind however: I’m no racer, and at 65 I’m fighting degenerative disc disease in my spine with three vertebrae that are bone on bone. And although I’ve been riding motorcycles my entire life, I just recently returned to riding off-road from a 30 plus year hiatus. Bikes have changed a bit and I have very little technical knowledge of current suspension or riding technique. Hell, the only real technical advice I’ve ever received was from a seven-year-old rider who told me that, “When you’re going straight, you should be standing up. When you’re going around a corner, you should be sitting down”. Who knew? Clearly, I may employ different techniques than some other riders. (Editor’s Note: Don’t let Frank’s poor-little-old-lady demeanor fool you, he hauls ass in the dirt and eagerly attempts to ride over younger riders who get in his way. I have personal experience with this.)
Throughout these modifications, I kept wondering about that other ‘race ready’ bike. Should I? Just for fun I plugged my data into Race Tech’s calculator for a 2012 KTM 350. Not only would I have had to change the rear spring (at $40 more than the Yamaha’s) but would have had to change the fork springs too. New seat? Yeah, probably. Larger tank? Oh yeah. So did I save myself $4,000? Nope. My wife took that shopping and now has matching purses, shoes, and earrings.
Next stop on the WR250R upgrade train is FMF Q4 pipe with a mega-bomb header, then Thumper Racing’s 285 big bore kit. I’ll let you know how that goes.
Reverse the entire process, and you’ve just upgraded the rear suspension. (Editor’s Note: Don’t forget to set your sag!) This upgrade was very straight forward and easy. If you’re thinking about trying it, I would encourage you to do so.
Keep in mind though that my shock was in good shape, so there was no need for having that rebuilt. And this suspension upgrade is the bare minimum, it won’t improve valving. You may wonder why I addressed only the rear spring and not the front ones. Oddly enough, Race Tech’s calculator shows that my fork springs are within 10 pounds of rider weight to being correct. Seemed odd that Yamaha would spring the front for me and the rear for my grandson, but that’s what they did.
How’s it ride, you ask? I headed out 13 miles on pavement to a local OHV park, and was pleased right from the start. I expected the ride to be a bit more harsh, but it isn’t. It’s firmer, but I honestly believe it also feels more forgiving. I hit the OHV park via a heavily gravelled powerline road and was immediately impressed. The bike felt more planted and stable. Like the rear wheel was tracking the front better than stock. I hit a couple of mild hill climbs consisting of loose sand and rock with the same feeling, like the back was tracking better, not throwing me side to side like a missile whose guidance system just failed. The last thing I noticed was that the WR250R was much easier to control in the whoops. I never did get ‘nutted’, which was just fricking awesome!!
Some things to keep in mind however: I’m no racer, and at 65 I’m fighting degenerative disc disease in my spine with three vertebrae that are bone on bone. And although I’ve been riding motorcycles my entire life, I just recently returned to riding off-road from a 30 plus year hiatus. Bikes have changed a bit and I have very little technical knowledge of current suspension or riding technique. Hell, the only real technical advice I’ve ever received was from a seven-year-old rider who told me that, “When you’re going straight, you should be standing up. When you’re going around a corner, you should be sitting down”. Who knew? Clearly, I may employ different techniques than some other riders. (Editor’s Note: Don’t let Frank’s poor-little-old-lady demeanor fool you, he hauls ass in the dirt and eagerly attempts to ride over younger riders who get in his way. I have personal experience with this.)
Throughout these modifications, I kept wondering about that other ‘race ready’ bike. Should I? Just for fun I plugged my data into Race Tech’s calculator for a 2012 KTM 350. Not only would I have had to change the rear spring (at $40 more than the Yamaha’s) but would have had to change the fork springs too. New seat? Yeah, probably. Larger tank? Oh yeah. So did I save myself $4,000? Nope. My wife took that shopping and now has matching purses, shoes, and earrings.
Next stop on the WR250R upgrade train is FMF Q4 pipe with a mega-bomb header, then Thumper Racing’s 285 big bore kit. I’ll let you know how that goes.
 About the Author: Life-sized action figure and scientific anomaly Frank Morton enlisted in the Marine Corps the day after graduating High School and went to Vietnam. After his Tour of Duty he joined the Oregon State Police and spent several decades fighting crime and scraping dead people off highways. Now retired, he divides his time between exploring the back roads of Oregon and repairing the damage he’s done to his dual sport in his workshop, all while ingesting copious amounts of coffee.